Reusable water bottles are a staple in our daily lives. Whether you take yours to the gym, office, or just keep it by your side throughout the day, it’s a convenient and ECO-friendly way to stay hydrated. But here’s the dirty truth—your beloved bottle might be teeming with bacteria. Studies have shown that poorly cleaned water bottles can harbor as many germs as a public toilet seat. Gross, right?
If you’re not cleaning your bottle properly (or often enough), every sip could be introducing bacteria straight into your system. The good news? With the right cleaning habits and bottle choice, you can keep your hydration safe and germ-free. Let’s break it down.
How Germs Take Over Your Water Bottle
1. Bacteria Sources
Your water bottle isn’t just a container—it’s a breeding ground for bacteria if not properly cleaned. Here’s how those germs sneak in and take over:
- Oral Transfer: Your Mouth is the Culprit
Every time you take a sip, bacteria from your mouth—such as Streptococcus species (commonly found in saliva)—enter the bottle. While Staphylococcus is less common in healthy mouths, it can also contaminate bottles through unwashed hands or contact with surfaces like gym equipment. In a damp, enclosed environment, these bacteria multiply rapidly, especially if sugary or protein-rich residues are present. Sipping throughout the day without washing the bottle allows bacterial colonies to grow exponentially, increasing the risk of biofilm formation and potential health issues.
- Environmental Contamination: Your Bottle Picks Up Germs Everywhere
Think about where your water bottle goes. You set it on your desk, toss it in your gym bag, take it outdoors, or carry it in your car cupholder. Every surface it touches is a potential source of contamination. Unwashed hands? That’s another easy way for bacteria to transfer onto the bottle.
- Liquid Residues: What You Drink Matters
Plain water isn’t much of a problem, but sugary or protein-rich drinks like juice, smoothies, or protein shakes create the perfect breeding ground for bacteria. Sugar acts as a food source, helping bacteria multiply rapidly. Even coffee and tea residues can feed mold and fungi. If you don’t rinse your bottle immediately after drinking something other than water, it can quickly turn into a germ-filled mess.

2. Biofilm Buildup: The Slimy Layer Inside Your Bottle
Ever noticed a slick, slimy feeling inside your bottle? That’s biofilm—a sticky layer of bacteria that clings to the surface. Once biofilm forms, it becomes much harder to remove with just a quick rinse. Some bacteria within biofilm can survive even when washed with water, meaning they continue to grow unless properly scrubbed away.
The Science Behind the Grossness
Case Study: A Real-Life Experiment on Dirty Bottles
A food safety researcher at Purdue University, Carl Behnke, once decided to test how dirty his personal water bottle was. He wiped the inside with a clean tissue, only to find it came out covered in grime. This is a clear sign of bacterial buildup—something most of us don’t see unless we do a deep cleaning.
ATP Testing: How Filthy is Your Bottle, Really?
Scientists use ATP (Adenosine Triphosphate) testing to measure bacteria levels on surfaces. Studies have found that some reusable water bottles have ATP readings in the thousands—comparable to contaminated surfaces like public restrooms. While not all bacteria are harmful, a high ATP count indicates poor hygiene and the potential presence of dangerous pathogens.
Cleaning Mistakes You’re Probably Making
Even if you clean your bottle regularly, you might be missing key steps. Here are some common mistakes:
1. Quick Rinses Aren’t Enough
Simply swishing water around doesn’t remove bacteria, especially if biofilm has started forming. Without scrubbing, bacteria remain on the bottle’s interior.

2. Ignoring the Lids, Straws, and Seals
Bacteria love hidden spots like rubber seals, straw openings, and bottle caps. These areas are often overlooked during cleaning but are some of the worst offenders when it comes to contamination. If you’re not taking them apart, you’re missing 75% of the germs.

3. Waiting Until Your Bottle Smells Bad
By the time your bottle has an odor, bacteria have already multiplied to significant levels. Cleaning should be a daily habit, not just when the smell becomes noticeable.
How to Clean Your Bottle Like a Pro
A quick rinse with water isn’t enough to keep your bottle bacteria-free. Proper cleaning is essential to prevent biofilm buildup, lingering odors, and hidden mold. Here’s how to clean your bottle the right way, whether it’s stainless steel, plastic, or has built-in straws.
1. General Tips for All Bottles
- Wash Daily:Even if you’re only using it for water, bacteria from your mouth and the environment accumulate quickly. A daily wash prevents buildup.
- Hot Water + Dish Soap: Warm water alone isn’t enough—use dish soap to break down oils, bacteria, and potential mold growth.
- Scrub, Don’t Just Rinse:Use a bottle brush to reach the bottom and sides, ensuring no residue is left behind.
- Don’t Forget the Lid & Seals:Bacteria love hiding in rubber gaskets, straws, and small crevices. Disassemble any removable parts and clean them separately.
- Dry Thoroughly:Never seal a damp bottle—it creates the perfect environment for bacteria. Always let your bottle air dry completely before putting the lid back on.

2. Stainless Steel Bottles
- Deep Clean with Baking Soda & Vinegar: For tough stains or lingering smells, fill the bottle with a mix of 1 tablespoon of baking soda, 2 tablespoons of vinegar, and hot water. Let it sit for 15 minutes, then scrub and rinse.
- Avoid Bleach or Harsh Chemicals: Harsh cleaners can damage the bottle’s protective coating and affect its longevity. Stick to natural or mild solutions.
- Sanitize in the Dishwasher (If Safe):Check the manufacturer’s recommendations—some stainless steel bottles are dishwasher-safe, while others require hand washing.

3. Plastic Bottles
Plastic bottles are more prone to scratches and bacteria buildup, so they need extra attention.
- Gentle Scrubbing: Avoid abrasive scrubs that create micro-scratches (germ hideouts!). Use mild soap and a soft brush.
- Lemon Freshness: Soak with lemon juice + water to kill odors (especially after protein shakes).
- Replace When: Replace if cloudy or scratched—those tiny grooves are bacteria condos.

Pro Tip: Avoid hot liquids in plastic bottles—heat can warp the material and release chemicals.
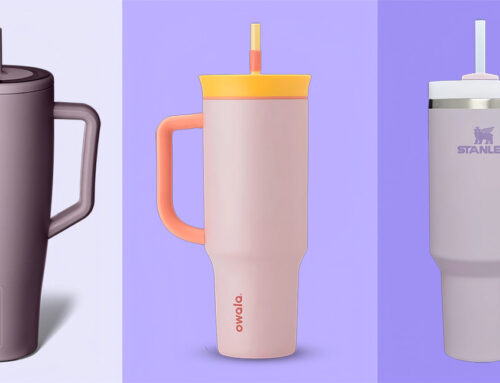
4. Bottles with Straws
Straws and built-in spouts are some of the hardest parts to clean, making them a hotspot for bacteria.
- Disassemble Everything: If the straw or spout is removable, take it apart and wash each piece separately to ensure no bacteria is left behind.
- Use a Straw Brush: A thin straw-cleaning brush is essential for removing trapped residue inside narrow straws.
- Flush with Soapy Water: Fill the straw with warm, soapy water and use suction (or a syringe) to push it through. Rinse until no soap remains.
- Sanitize Seals: Silicone parts can harbor mold. Boil them for 5 minutes monthly (if heat-safe).

Material Matters: Choosing a Hygienic Bottle
Not all bottles are created equal when it comes to cleanliness. The material of your bottle plays a major role in how easy it is to clean, how resistant it is to bacteria, and how long it stays safe for use. Let’s break down the pros and cons of different bottle materials so you can choose the most hygienic option for your daily hydration needs.
1. Stainless Steel: The Hygiene Champion
Pros:
- Non-Porous Surface: Stainless steel doesn’t absorb odors or liquids, making it resistant to bacterial colonization. Its smooth finish leaves fewer hiding spots for microbes.
- Scratch-Resistant: Unlike plastic, stainless steel rarely develops tiny grooves where bacteria can thrive.
- Chemical-Free: High-quality stainless steel (grades 304 or 316) won’t leach harmful chemicals, even with hot or acidic drinks.
- Easy to Clean: Most stainless steel bottles are dishwasher-safe, and their wide-mouth designs allow thorough scrubbing.
Cons:
- Weight and Cost: Heavier than plastic and often pricier, but the long-term hygiene benefits often justify the investment.

2. Plastic Bottles:
Pros:
- Affordable and Light: Ideal for active lifestyles or budget-conscious users.
- Shatterproof: Safer for kids or outdoor activities compared to glass.
Cons:
- Scratch-Prone: Microscopic scratches in plastic create perfect nooks for bacteria and biofilm. Over time, these can become stubborn breeding grounds.
- Odor Retention: Plastic tends to hold onto smells from drinks like coffee or smoothies, which can indicate bacterial residues.
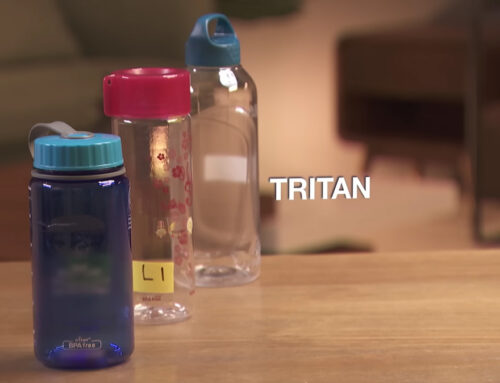
- Chemical Concerns: Even BPA-free plastics may contain other chemicals that could leach, especially when exposed to heat.
3. Glass
Hygienic and non-porous, but fragile and impractical for on-the-go use.
4. What to Look for in a Clean-Friendly Bottle
Regardless of the material, certain design elements can make a huge difference in how easy your bottle is to clean and how well it resists bacteria.
- Wide-Mouth Openings:
Easier to scrub and less likely to trap bacteria compared to narrow-neck bottles.
- Fully Removable Parts:
Lids, straws, and silicone seals should be disassembled completely for deep cleaning. Hidden crevices in complex lids are notorious germ hubs.
- Smooth, Seamless Interiors:
Avoid bottles with textured insides or decorative ridges. The fewer grooves, the fewer places bacteria can hide.
When to Replace Your Bottle
Even with regular cleaning, no water bottle lasts forever. Over time, wear and tear can create bacterial hotspots that are difficult to clean, making replacement necessary. Here’s how to know when it’s time to swap out your bottle for a new one.
Signs It’s Time for a New One:
- Persistent Odors That Won’t Go Away
If your bottle still smells funky after deep cleaning, bacteria have likely embedded themselves in scratches or porous surfaces, making them nearly impossible to remove.
- Visible Mold or Stains
If you notice mold growth—especially in hard-to-reach places like under the lid, in the straw, or along the rubber seal—it’s time to get a new bottle. Mold spores can be harmful if ingested.
- A Slimy or Sticky Interior
If your bottle always feels slimy even after washing, biofilm buildup might be too stubborn to remove completely. This is a sign that bacteria have deeply embedded themselves.
- Cracks, Scratches, or Discoloration
Scratches and cracks—especially in plastic bottles—create tiny crevices where bacteria hide. Once a bottle is damaged, it becomes much harder to clean effectively.
- Leaking or Loose Seals
If your bottle leaks, it might be due to a worn-out lid or deteriorating rubber seals. If replacement parts aren’t available, it’s best to replace the entire bottle.
How Long Do Bottles Last?
Stainless steel bottles can last years if well-maintained.
Plastic Bottles should be replaced every 3–6 months, depending on usage and signs of wear. Over time, plastic can degrade, scratch, and absorb odors.
Glass Bottles are generally long-lasting, but should be replaced immediately if chipped or cracked.
Conclusion
Your reusable water bottle is a hero for the planet—but it needs a little love to stay a hero for your health. Clean it daily, avoid sugary leftovers, and choose designs that make hygiene easy. Remember: If your bottle looks or smells off, it’s time to let it go. Stay hydrated, stay healthy, and keep those germs in check!